Garlic Sprouts with Pork: The “Garlic Star” on Spring Tables
Hello everyone! Today I’m sharing a spring seasonal home-style dish—Garlic Sprouts with Pork. Garlic sprouts are a spring-exclusive vegetable with crisp texture and rich garlic aroma, paired with tender pork slices—an unmissable spring delight. But achieving tender pork, crisp garlic sprouts, and rich savory sauce requires mastering a few key techniques. Learn these 3 secrets, and your garlic sprouts with pork will definitely become the star dish on spring dining tables!
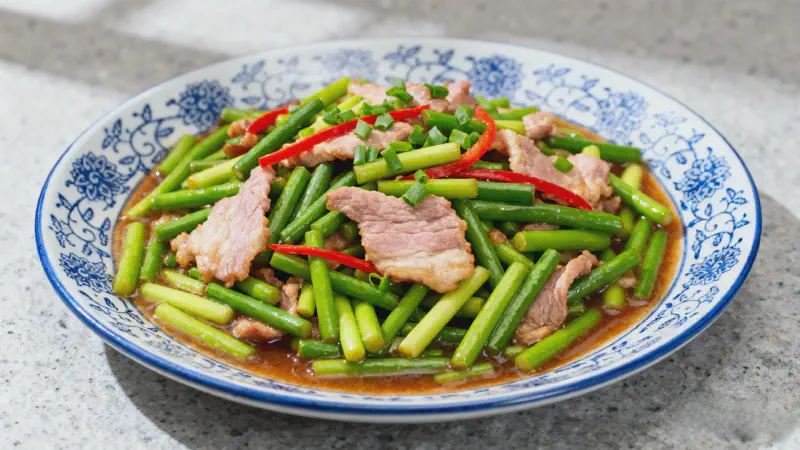
First, admire this emerald-fresh garlic sprouts with pork!
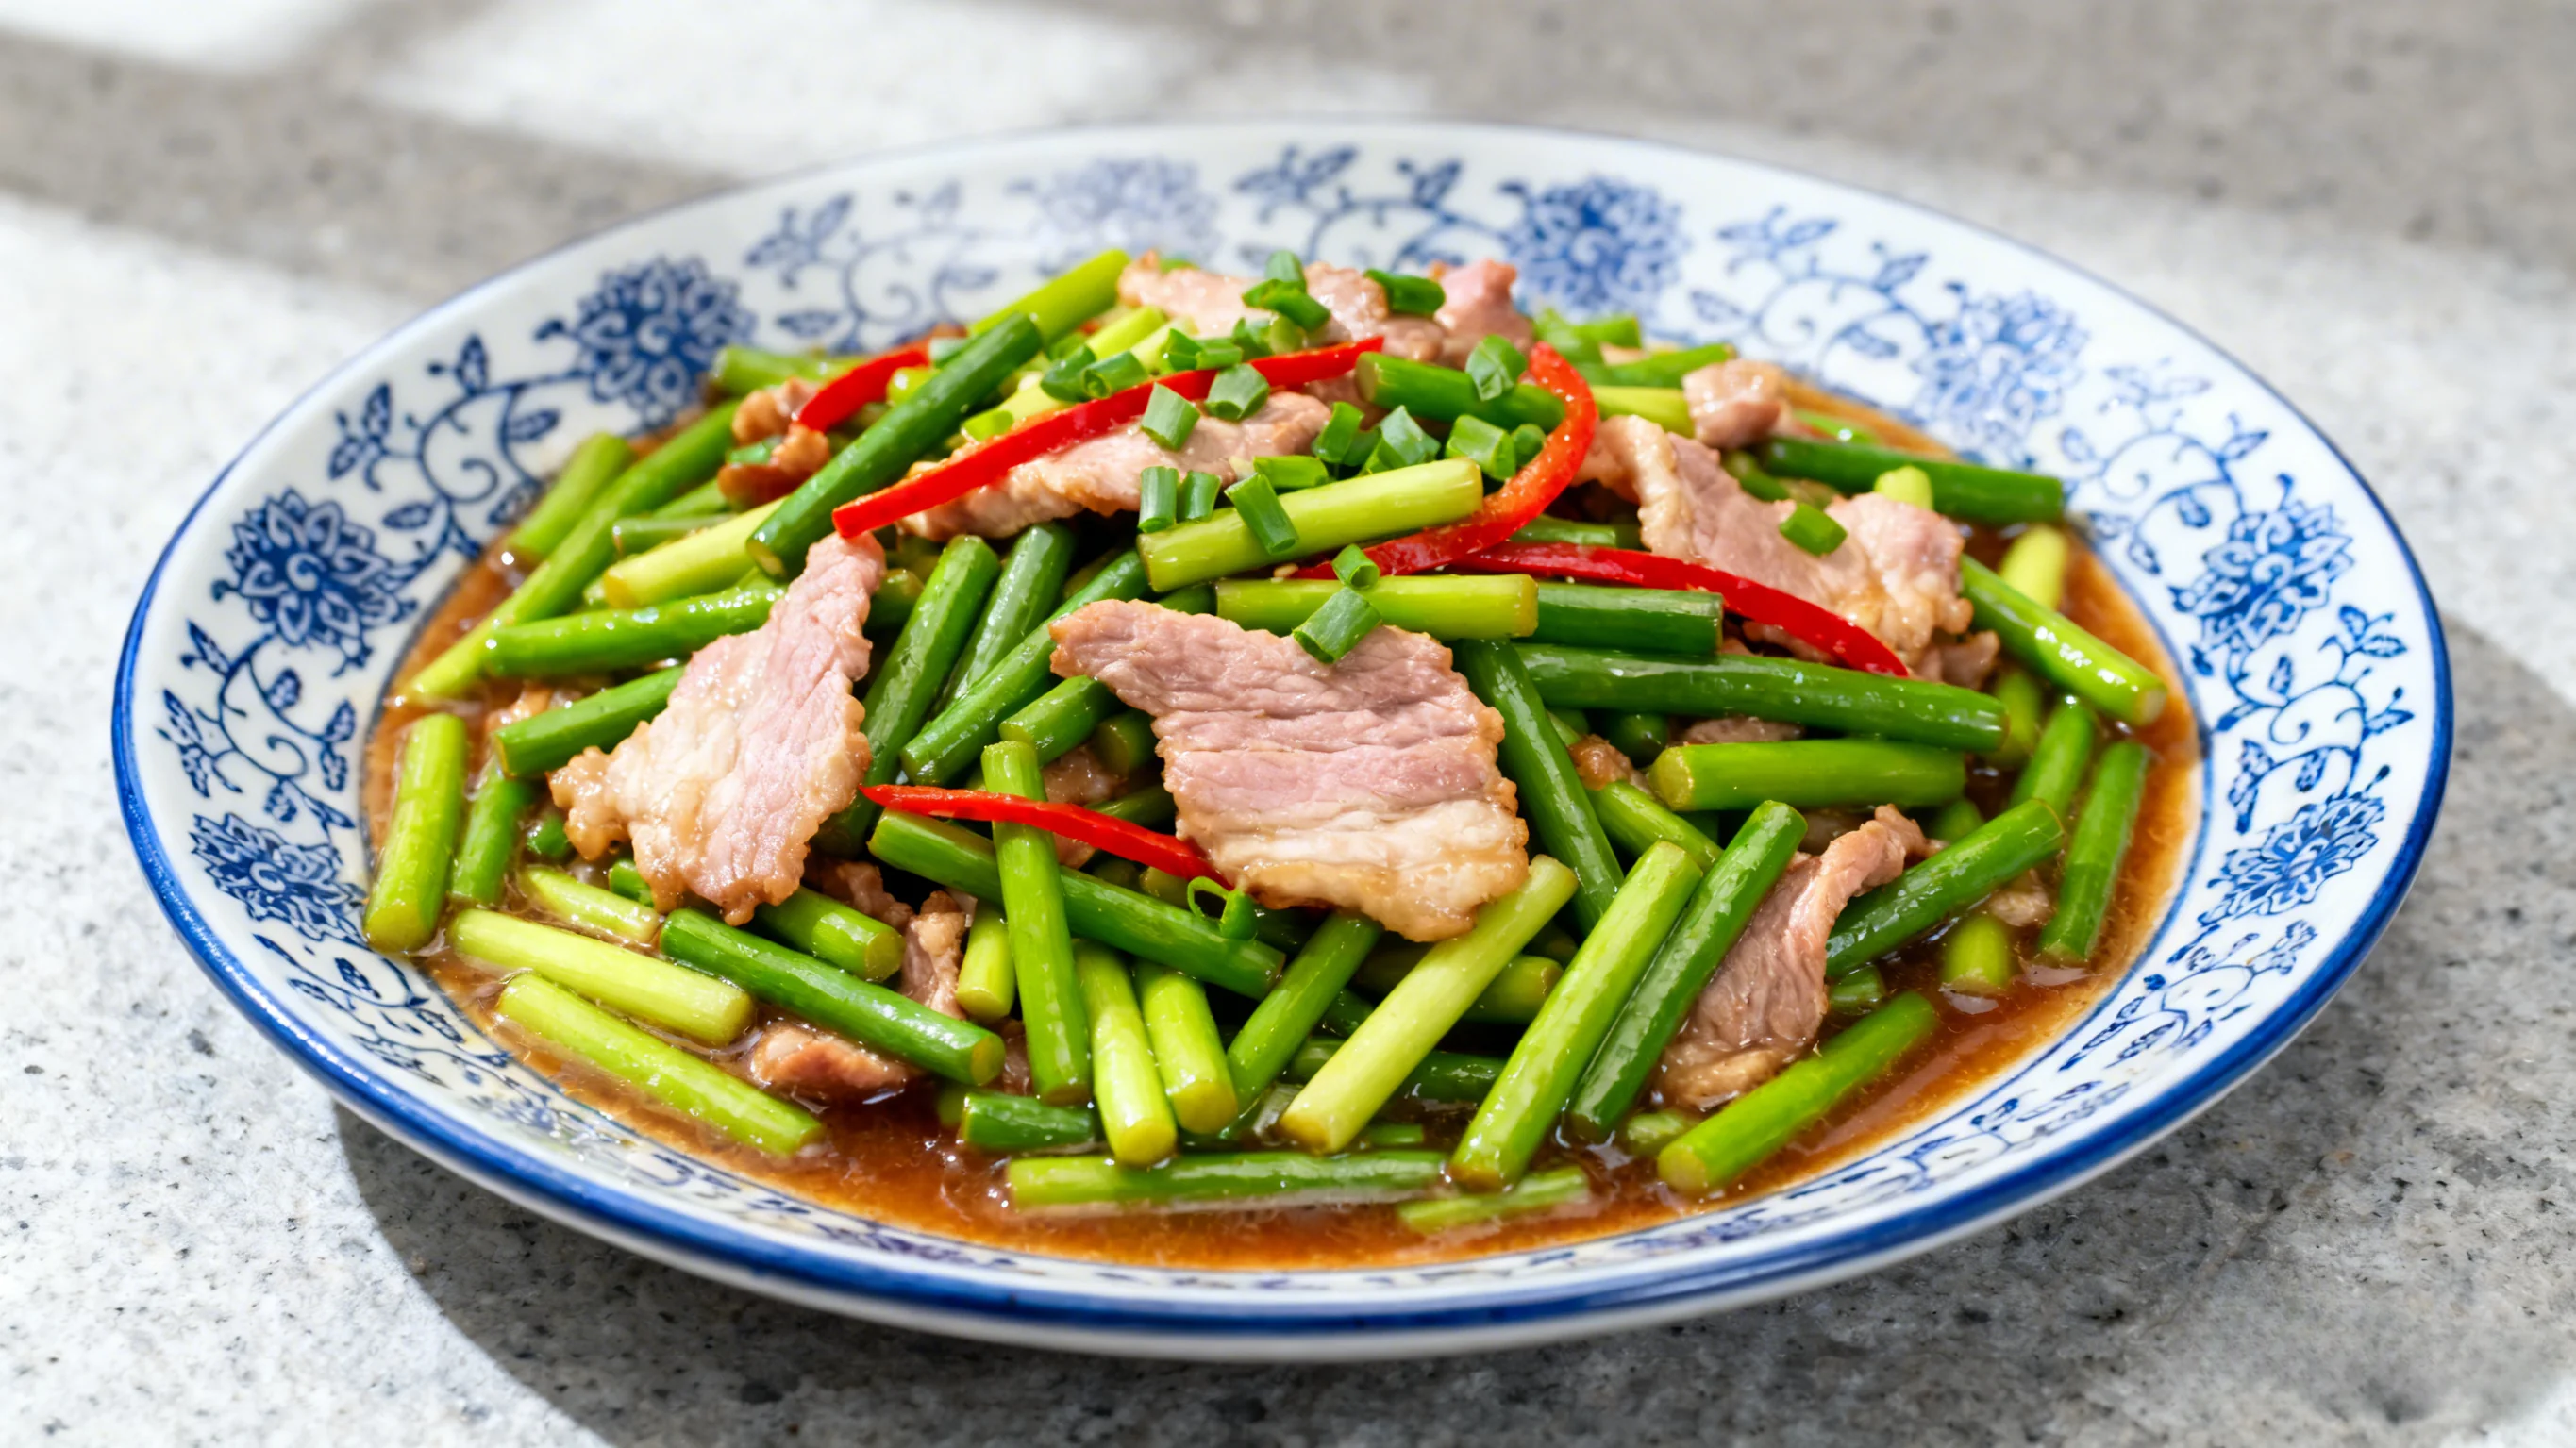 Tender green garlic sprouts, pink pork slices, bright red chili peppers—vibrant colors, aromatic garlic fragrance!
Detailed Step-by-Step Guide
Step 1: Ingredient Preparation (Secret #1)
- Pork choice: Tenderloin most tender, shoulder more flavorful
- Slicing technique: Against grain into thin slices, about 2mm thick
- Garlic sprout prep: Trim tough ends, cut into even sections
- Pro tip: Thicker sprouts can be split lengthwise
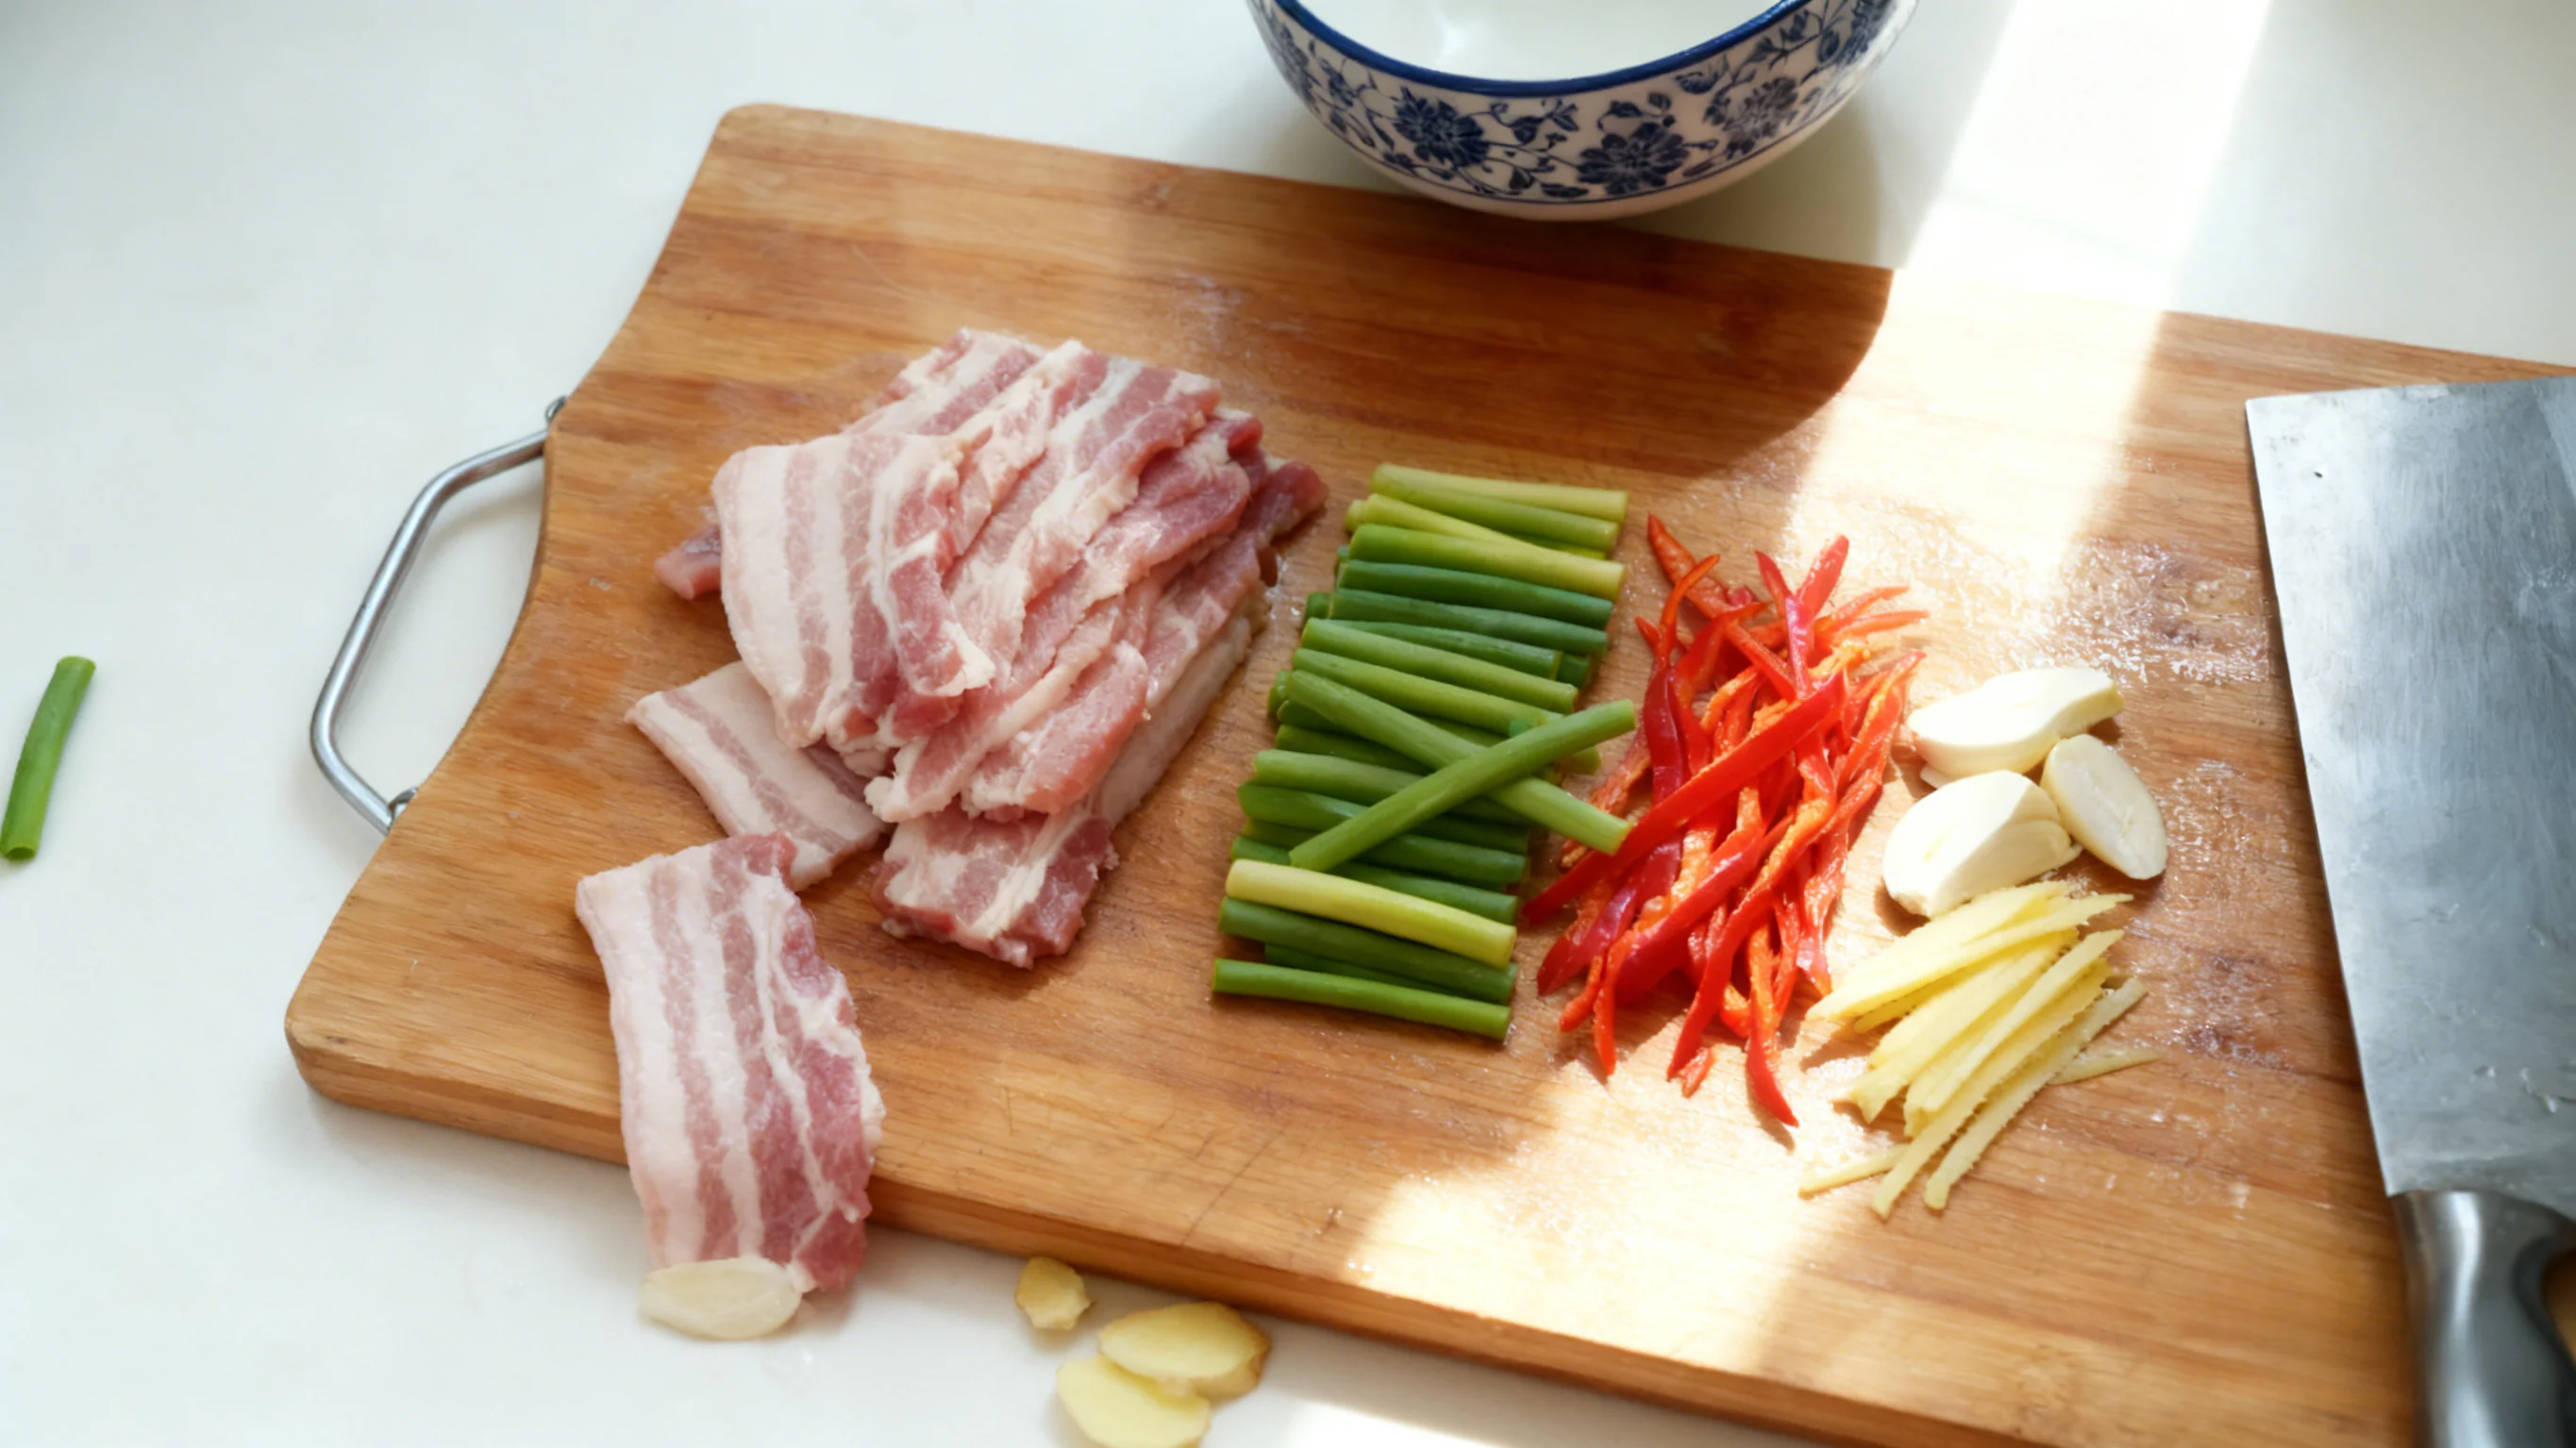 Slicing against grain breaks fibers for tenderness; even sprout sections cook uniformly
Step 2: Pork Marination
- First add soy sauce, cooking wine, sugar, pepper
- Mix until slices become sticky
- Then add cornstarch to lock in moisture
- Key step: Finally add oil to prevent sticking and seal moisture
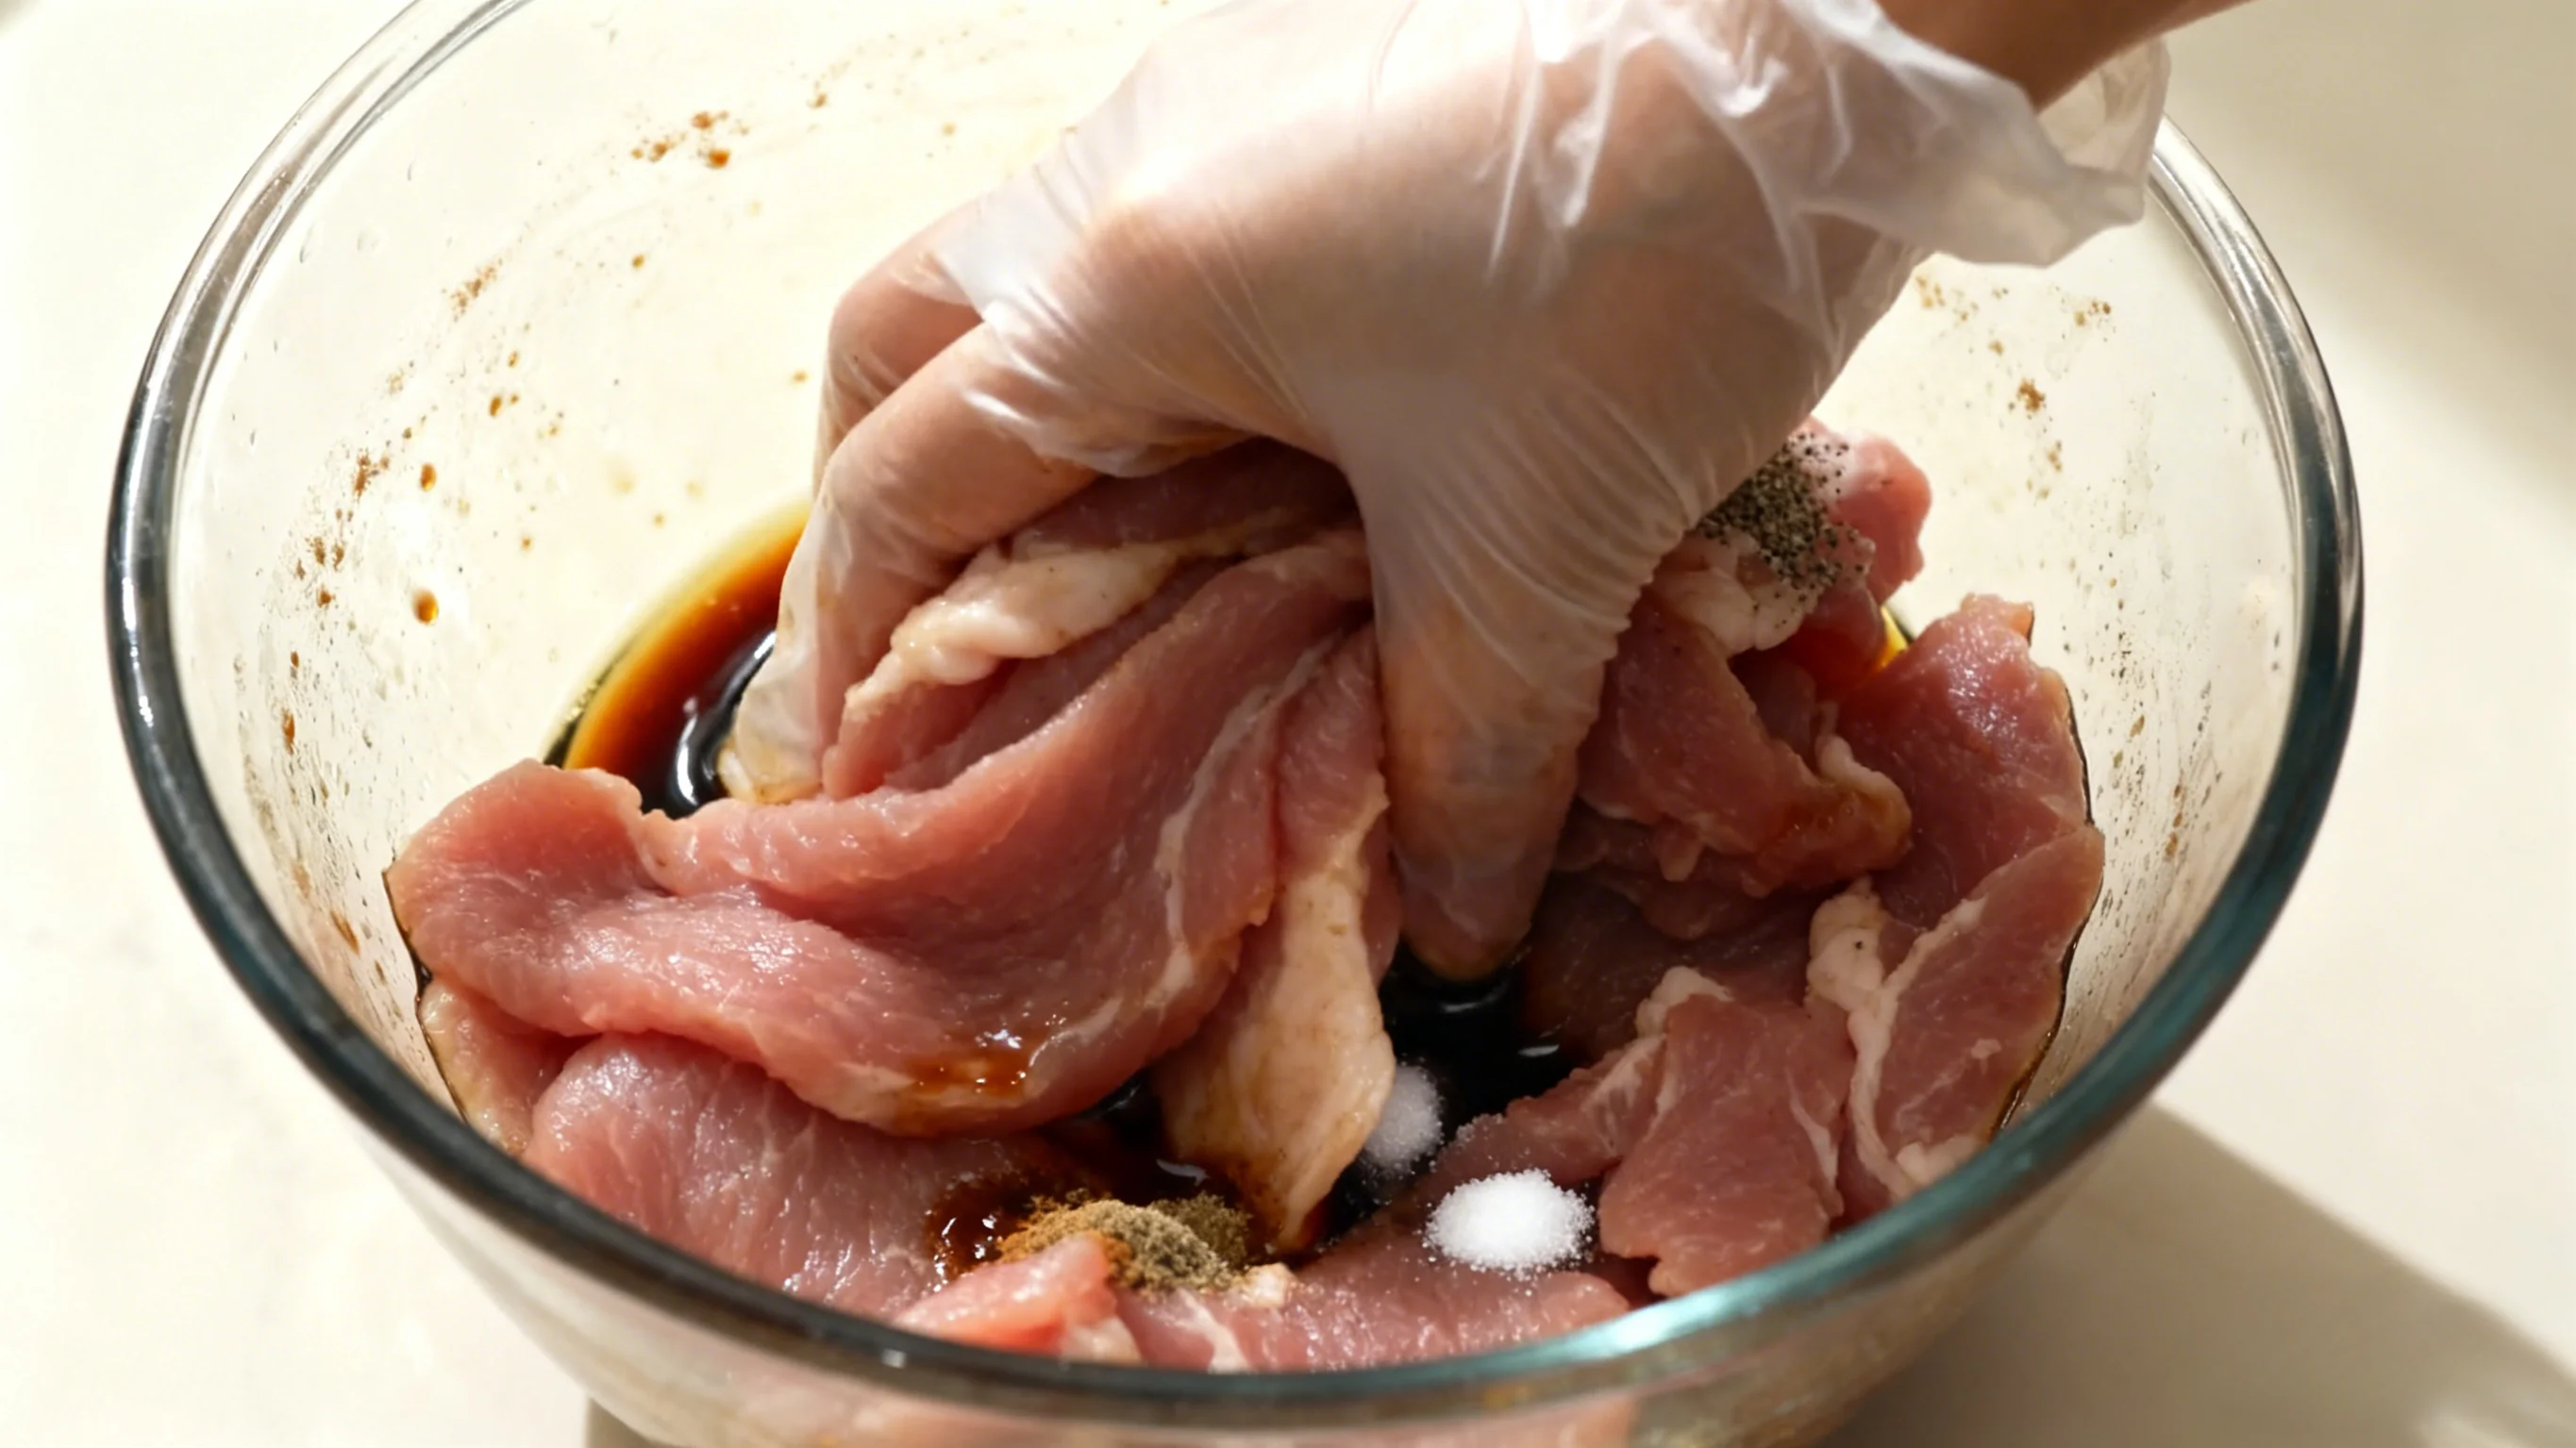 Thorough mixing helps marinade penetrate; oil creates protective layer
Step 3: Blanching Garlic Sprouts (Secret #2)
- Add salt and oil to water
- Blanch sprouts 30 seconds in boiling water
- Immediately rinse in cold water
- Drain thoroughly
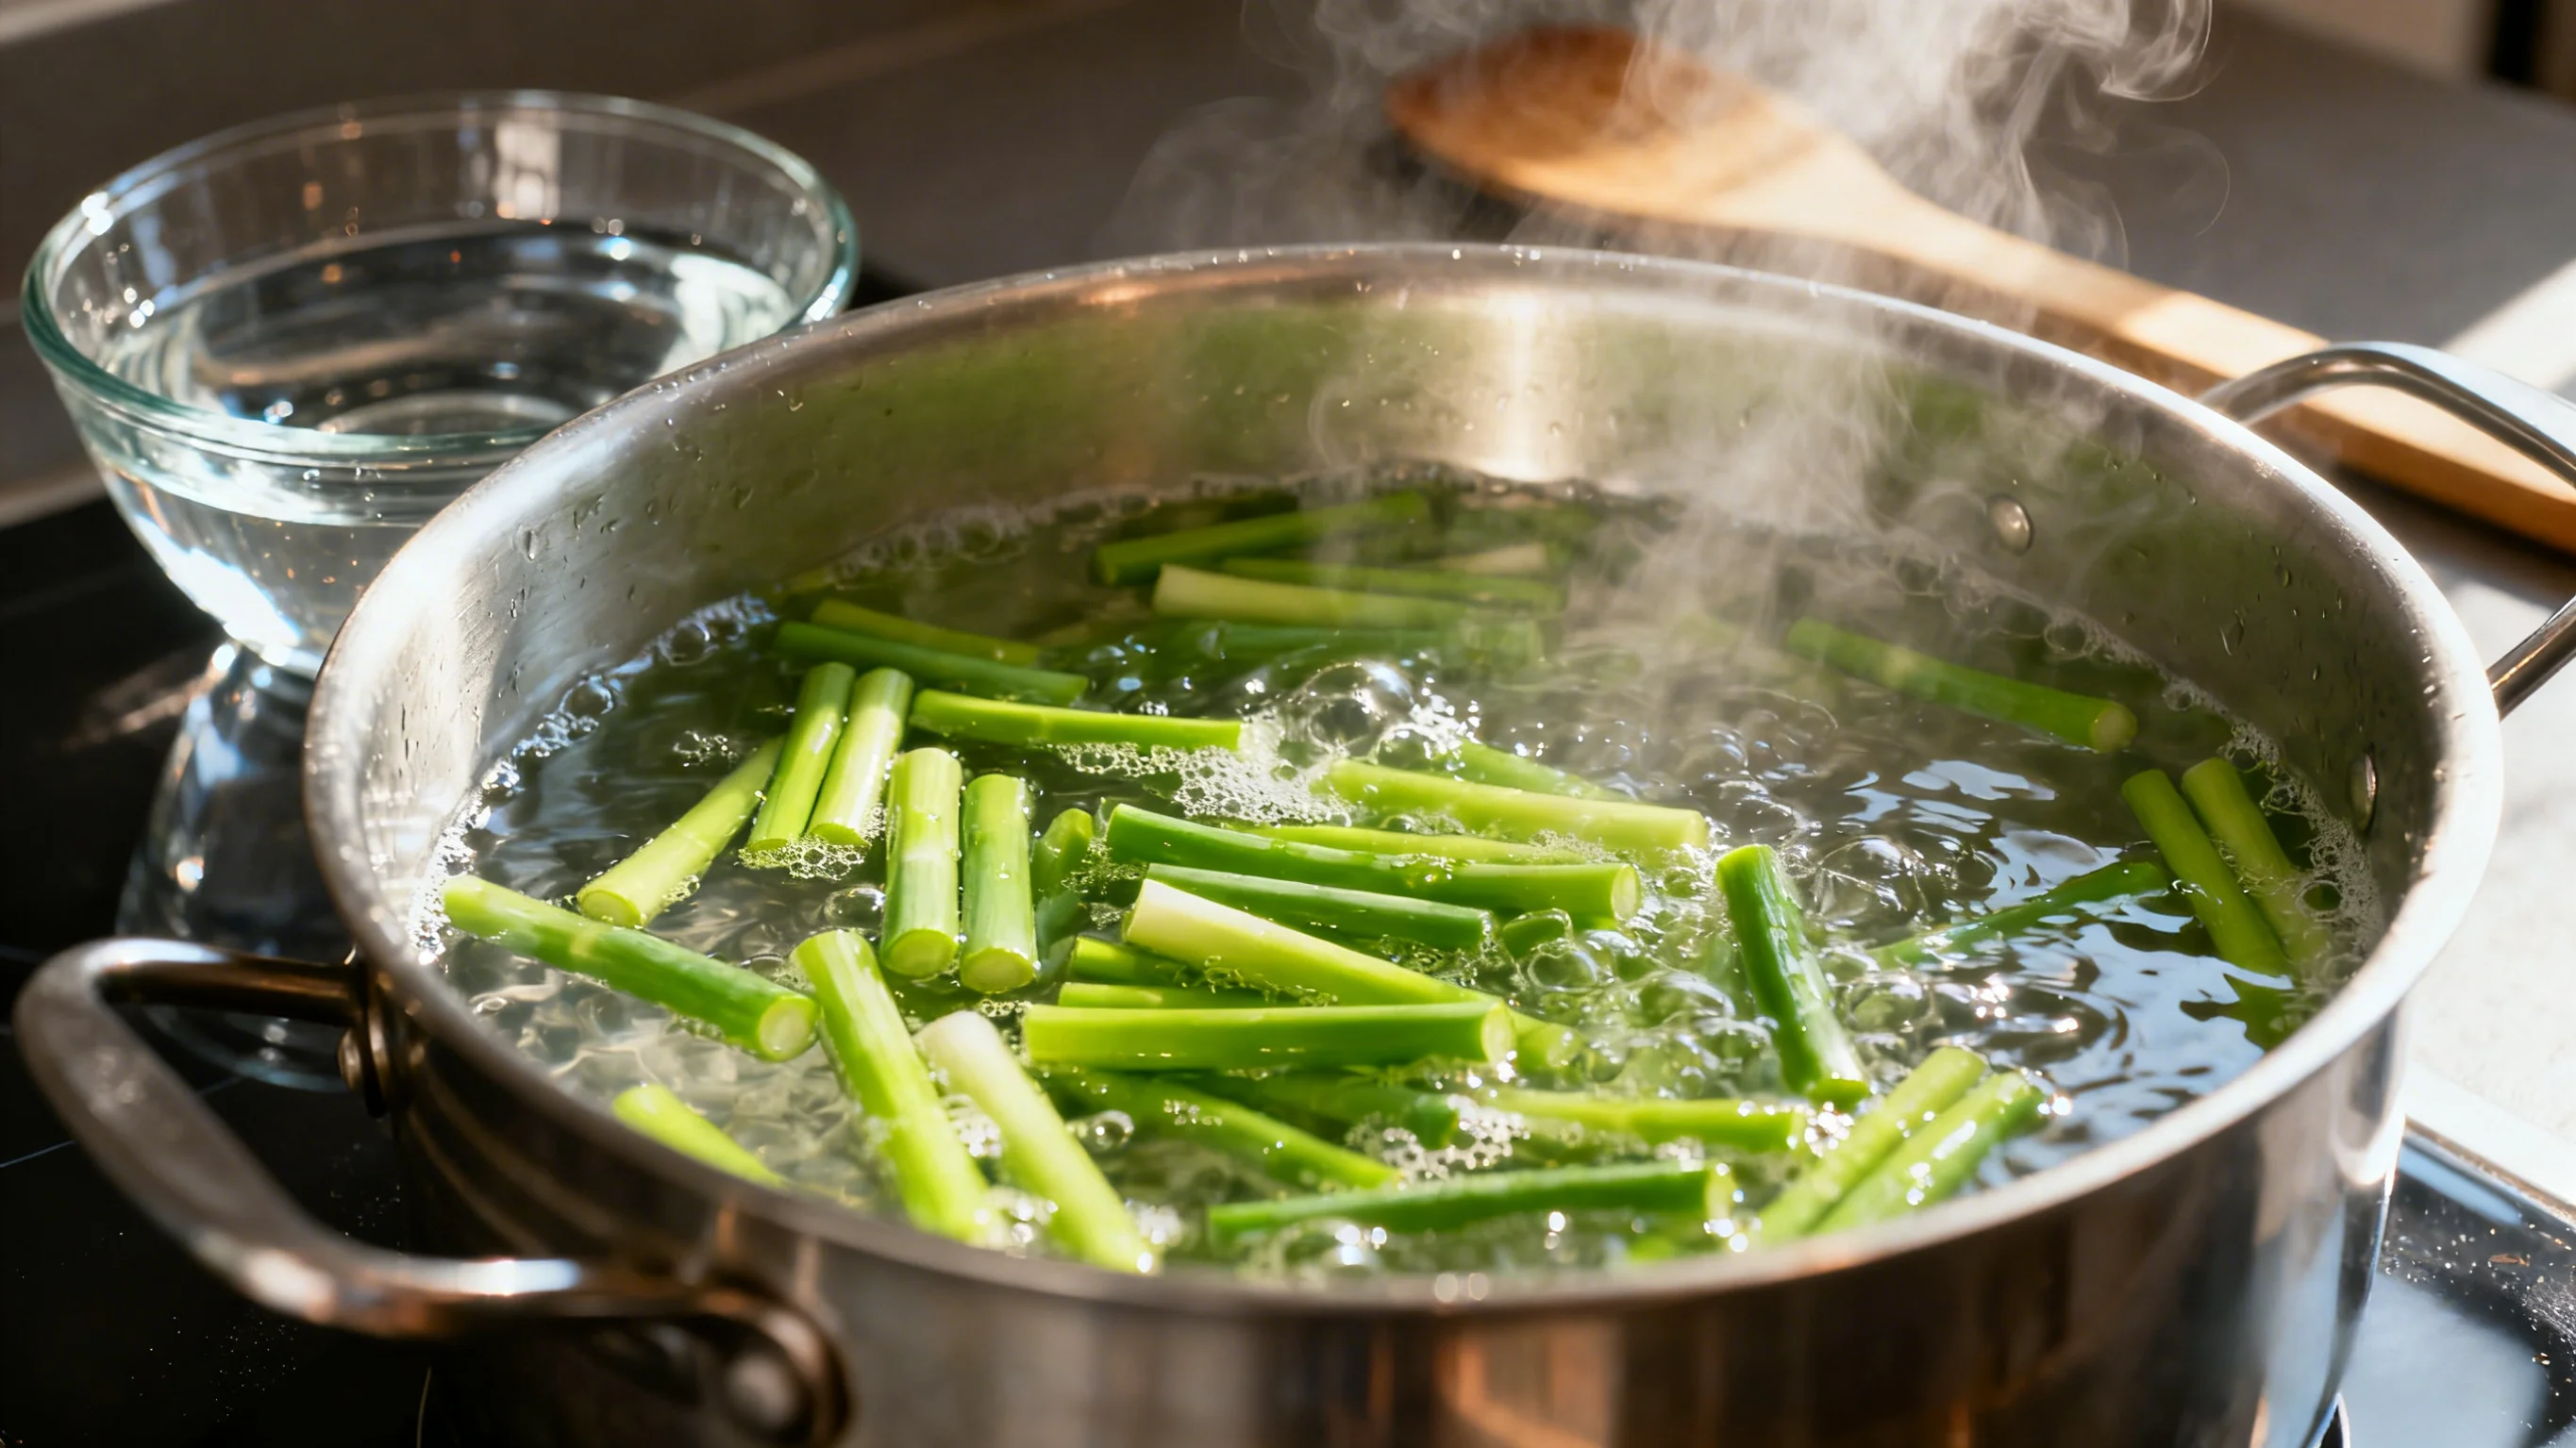 Blanching removes raw spiciness, maintains green color and crispness; cold water locks color
Step 4: Stir-frying Pork
- Hot pan with moderate temperature oil
- Quickly separate pork slices
- Remove immediately when color changes
- Timing key: About 70-80% cooked is sufficient
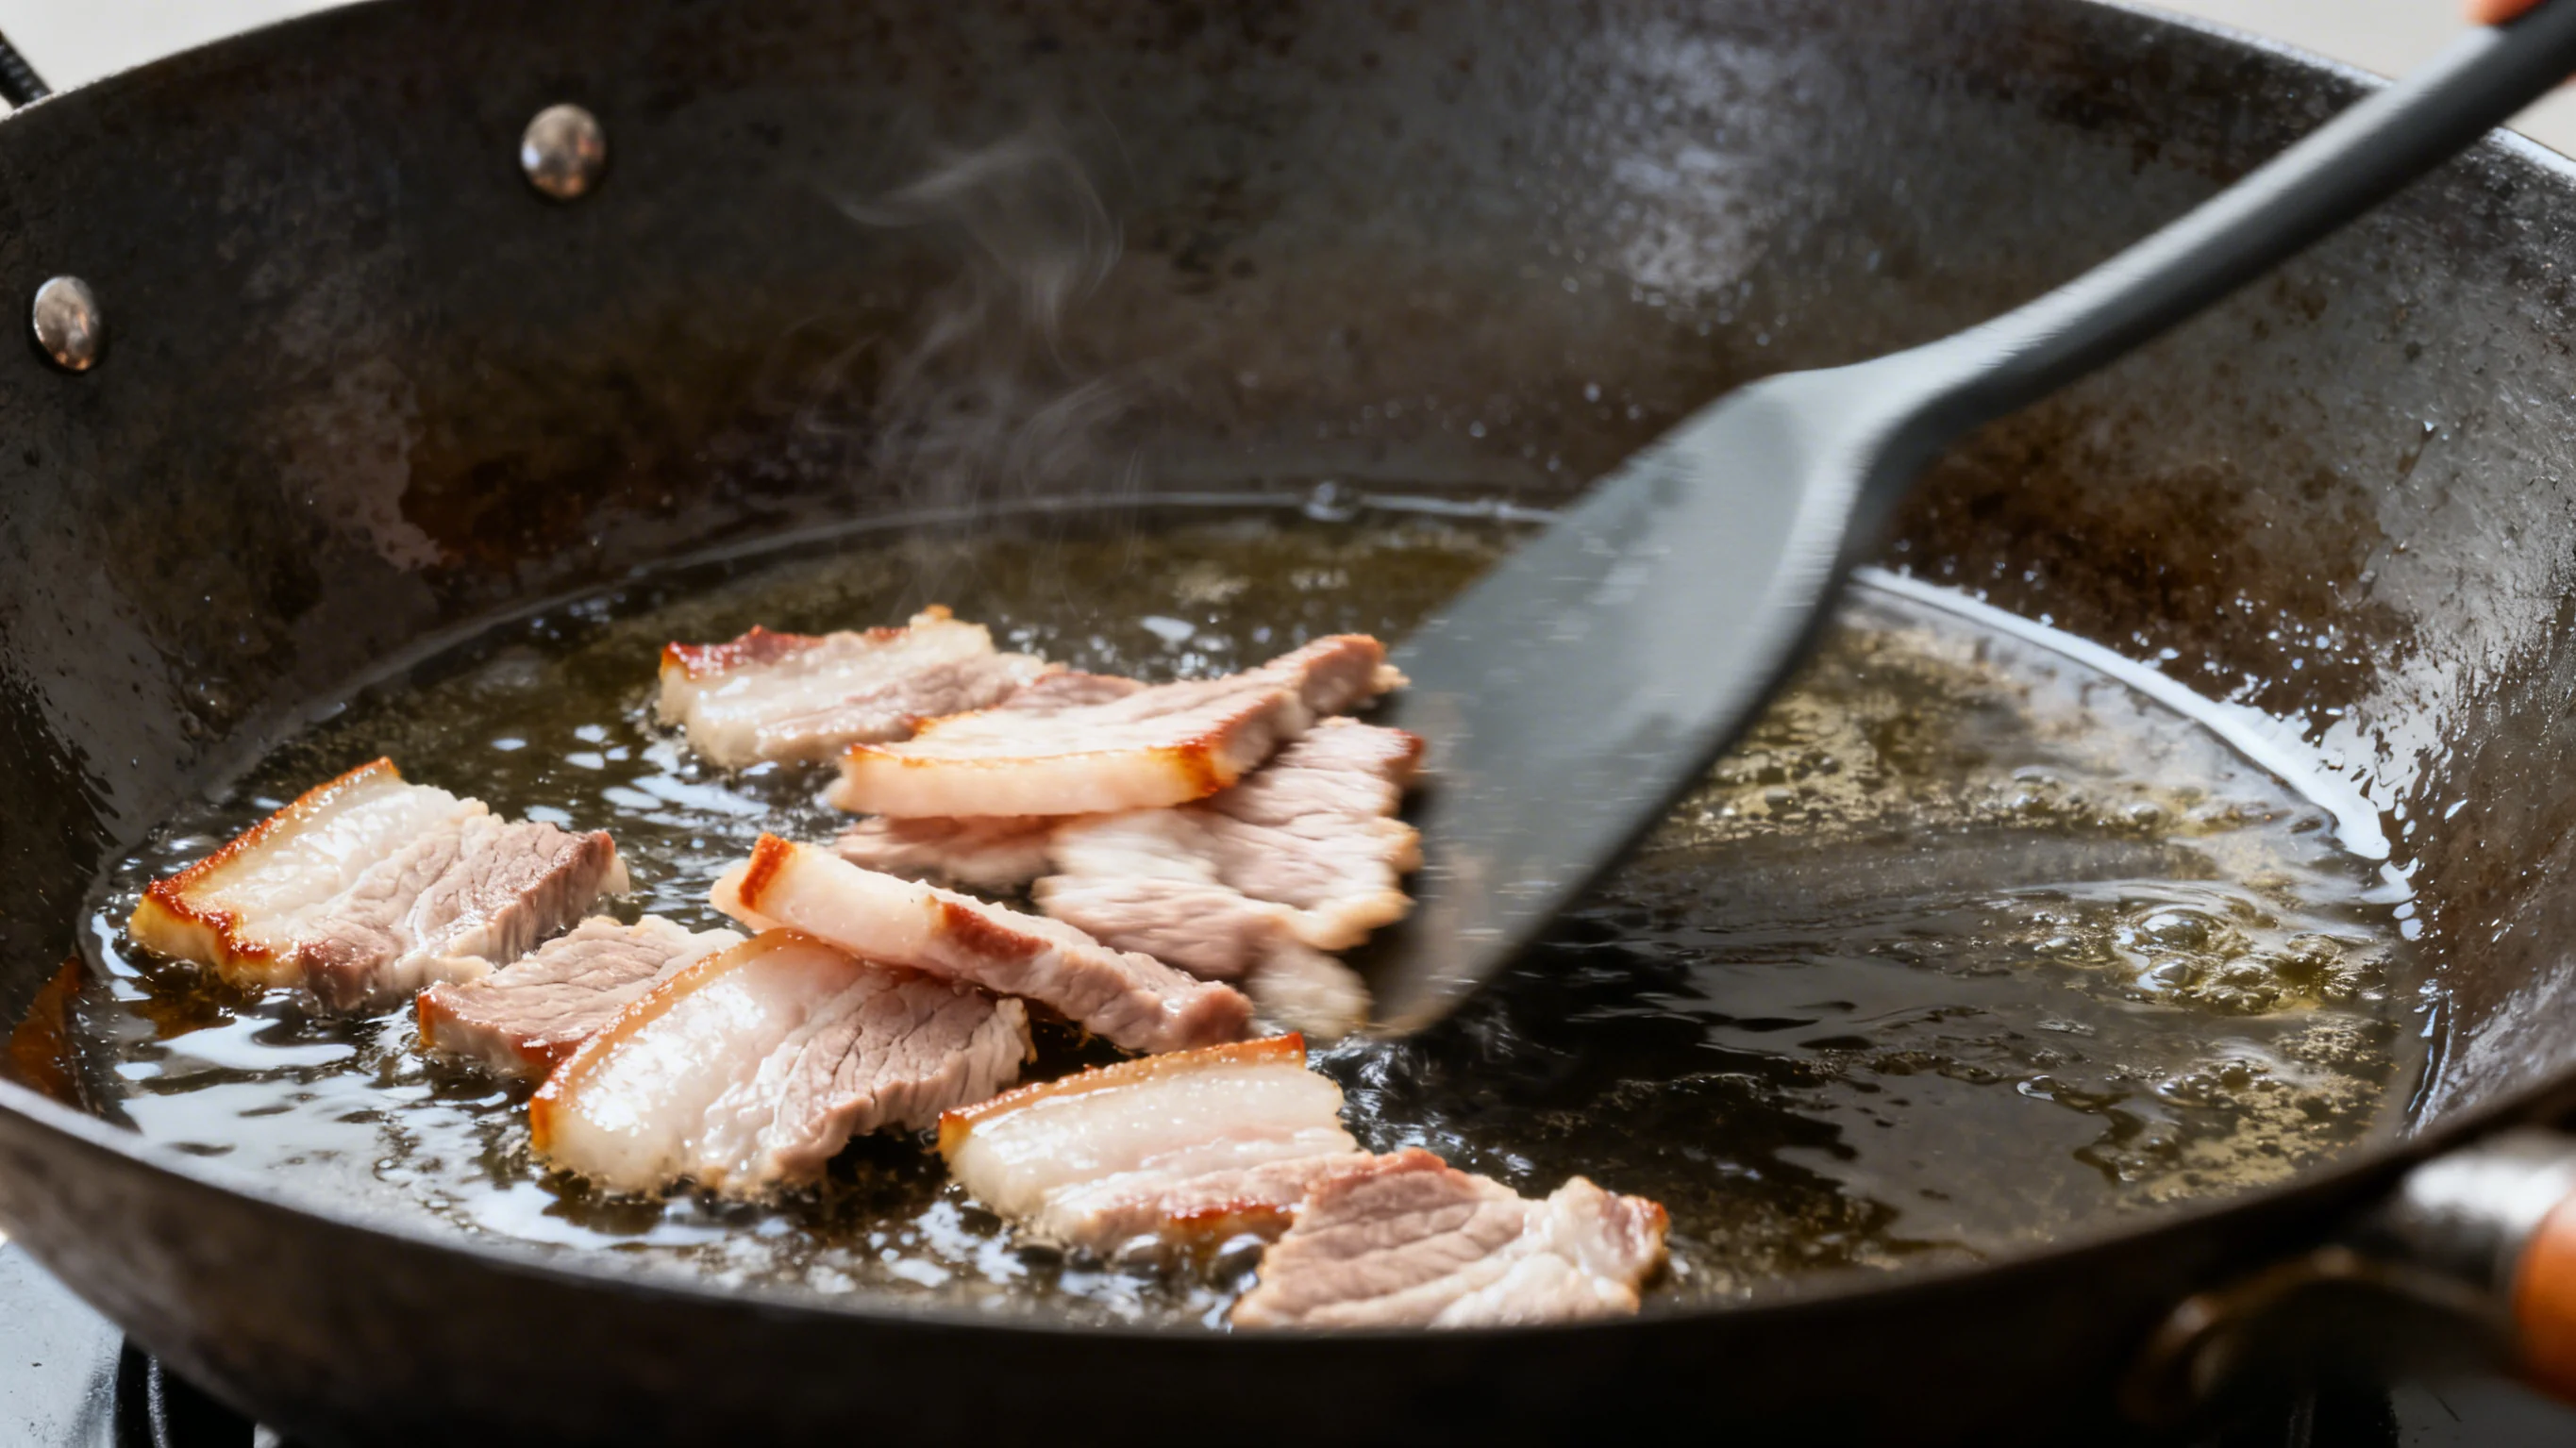 Moderate temperature keeps pork tender; early removal prevents overcooking
Step 5: Frying Aromatics
- Use remaining oil in pan
- Fry garlic and ginger first
- Cook until slightly golden and fragrant
- Quickly stir-fry chili strips
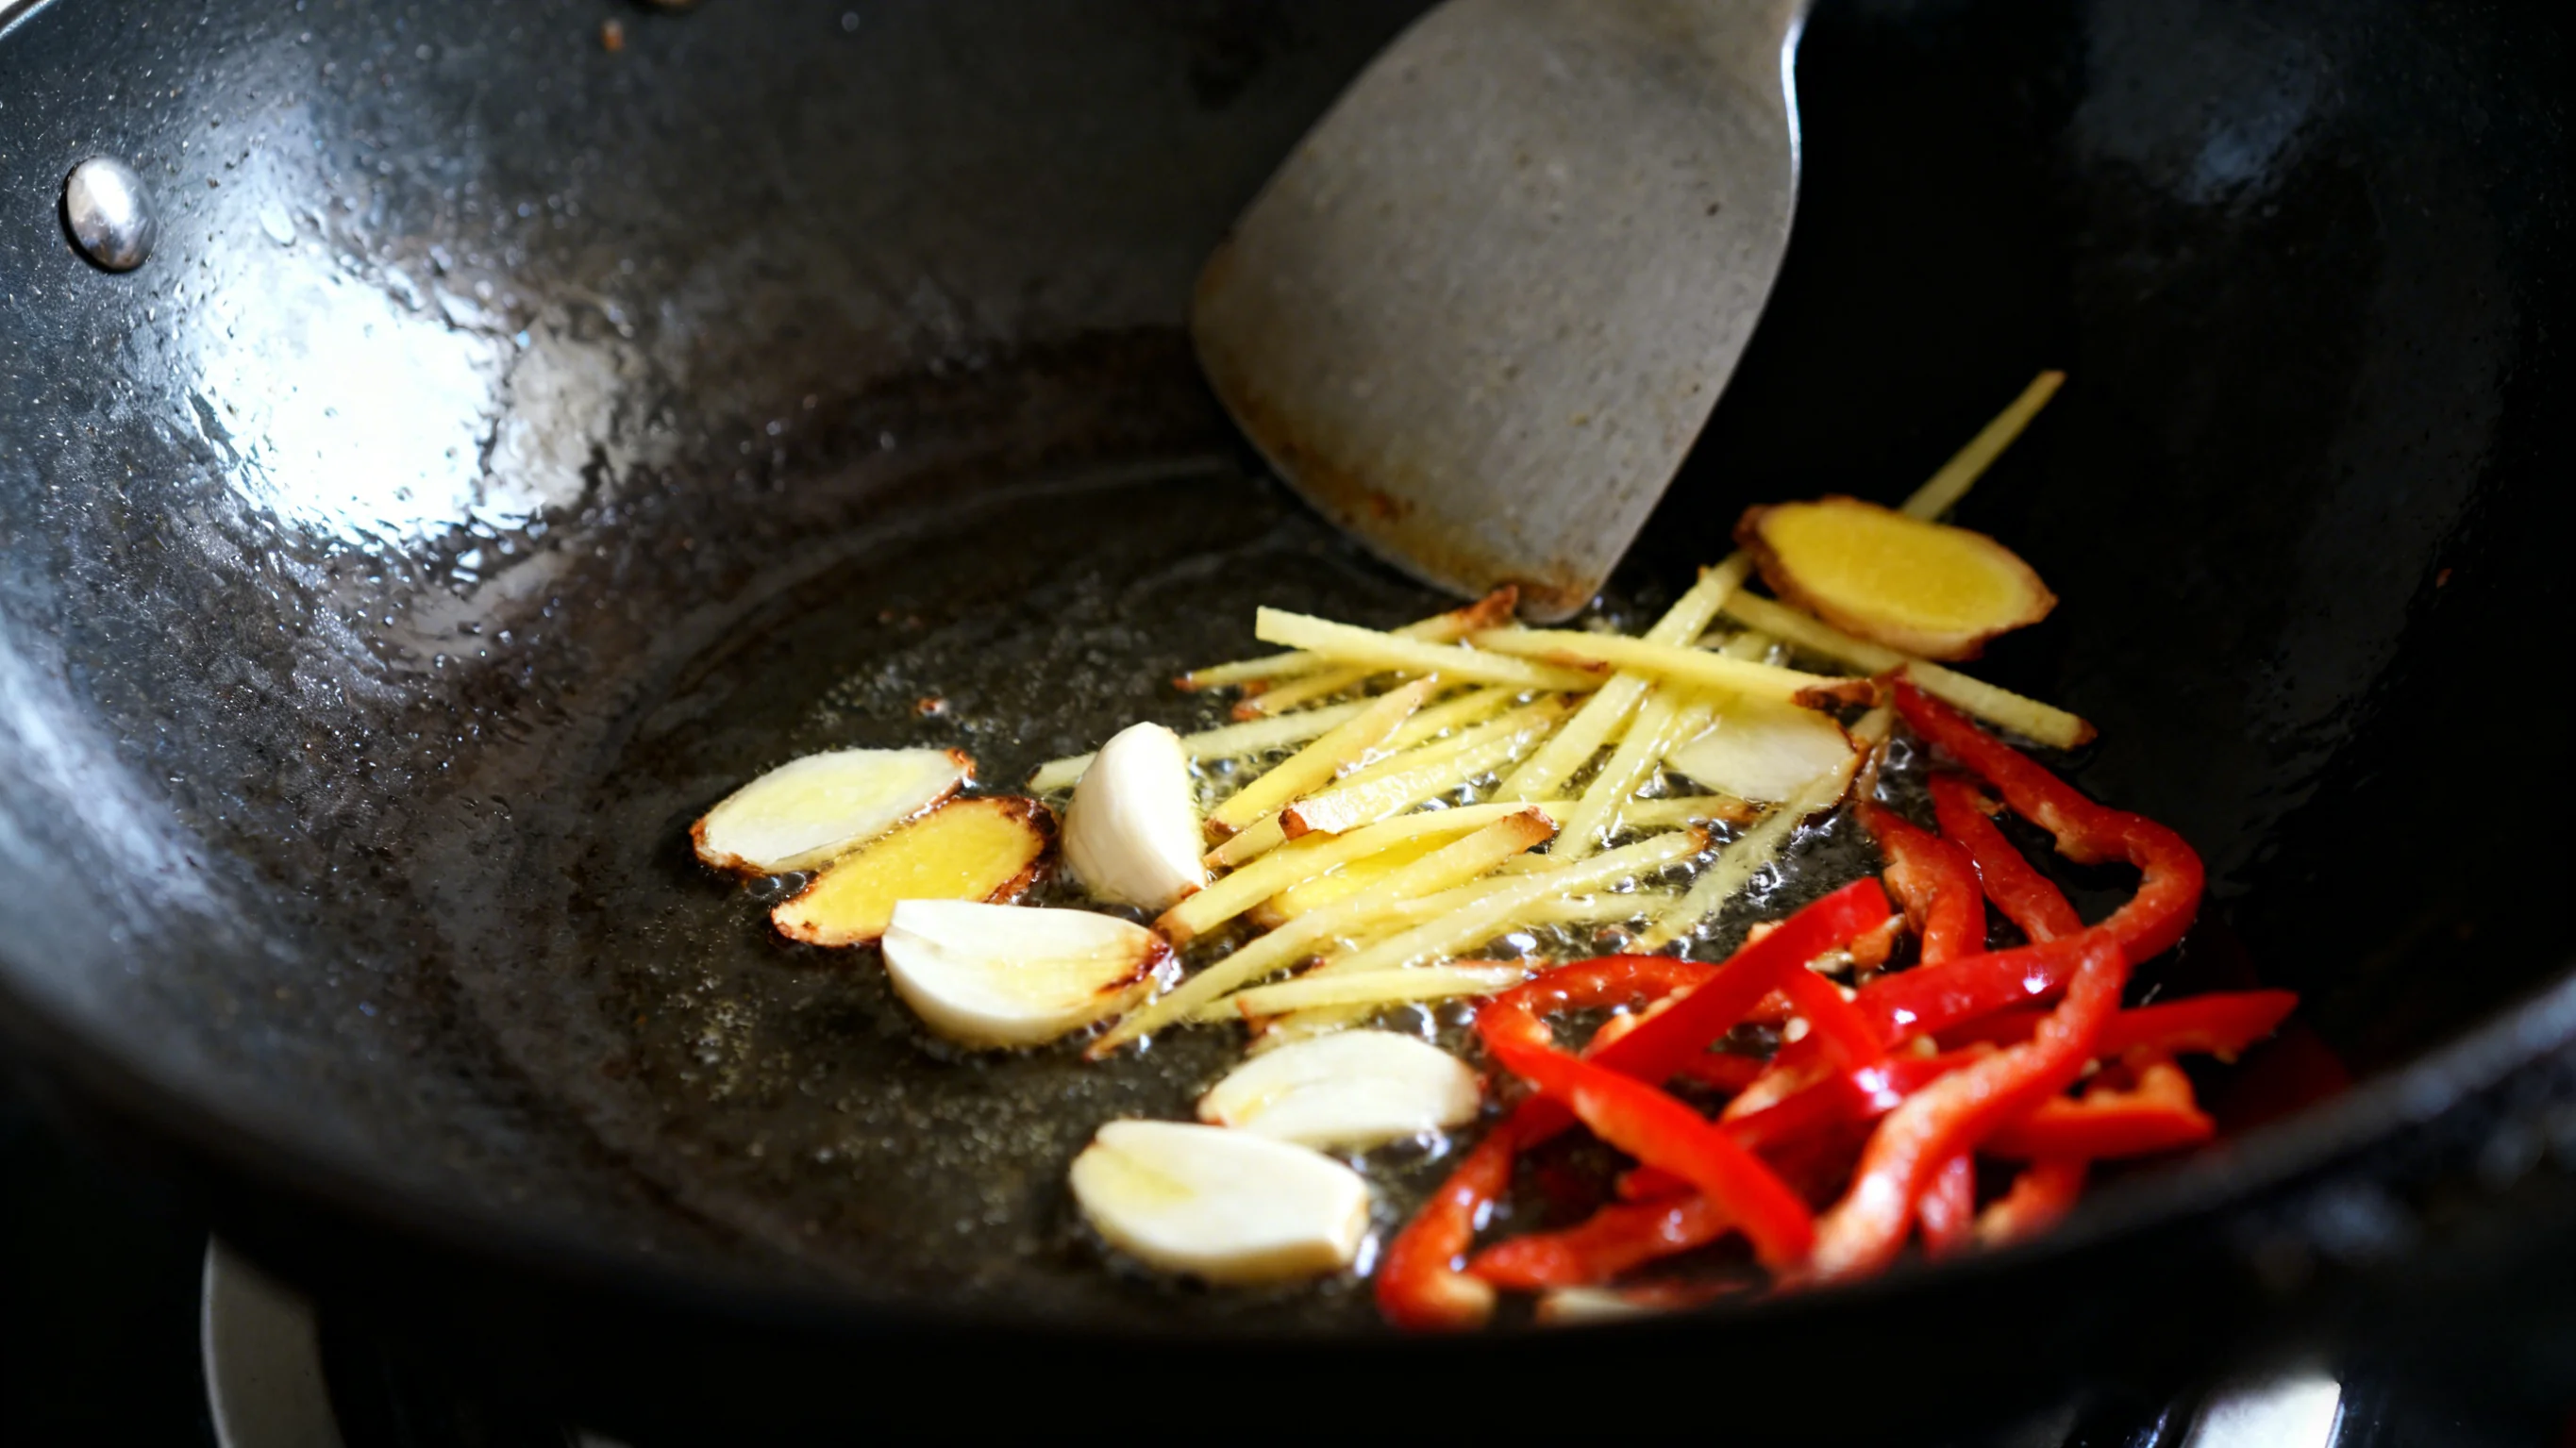 Frying garlic establishes flavor base; chili adds color and mild heat
Step 6: Stir-frying Sprouts
- Add blanched garlic sprouts
- Stir-fry quickly over high heat
- Cook about 1 minute
- Pro technique: Splash water along pan edge for steam
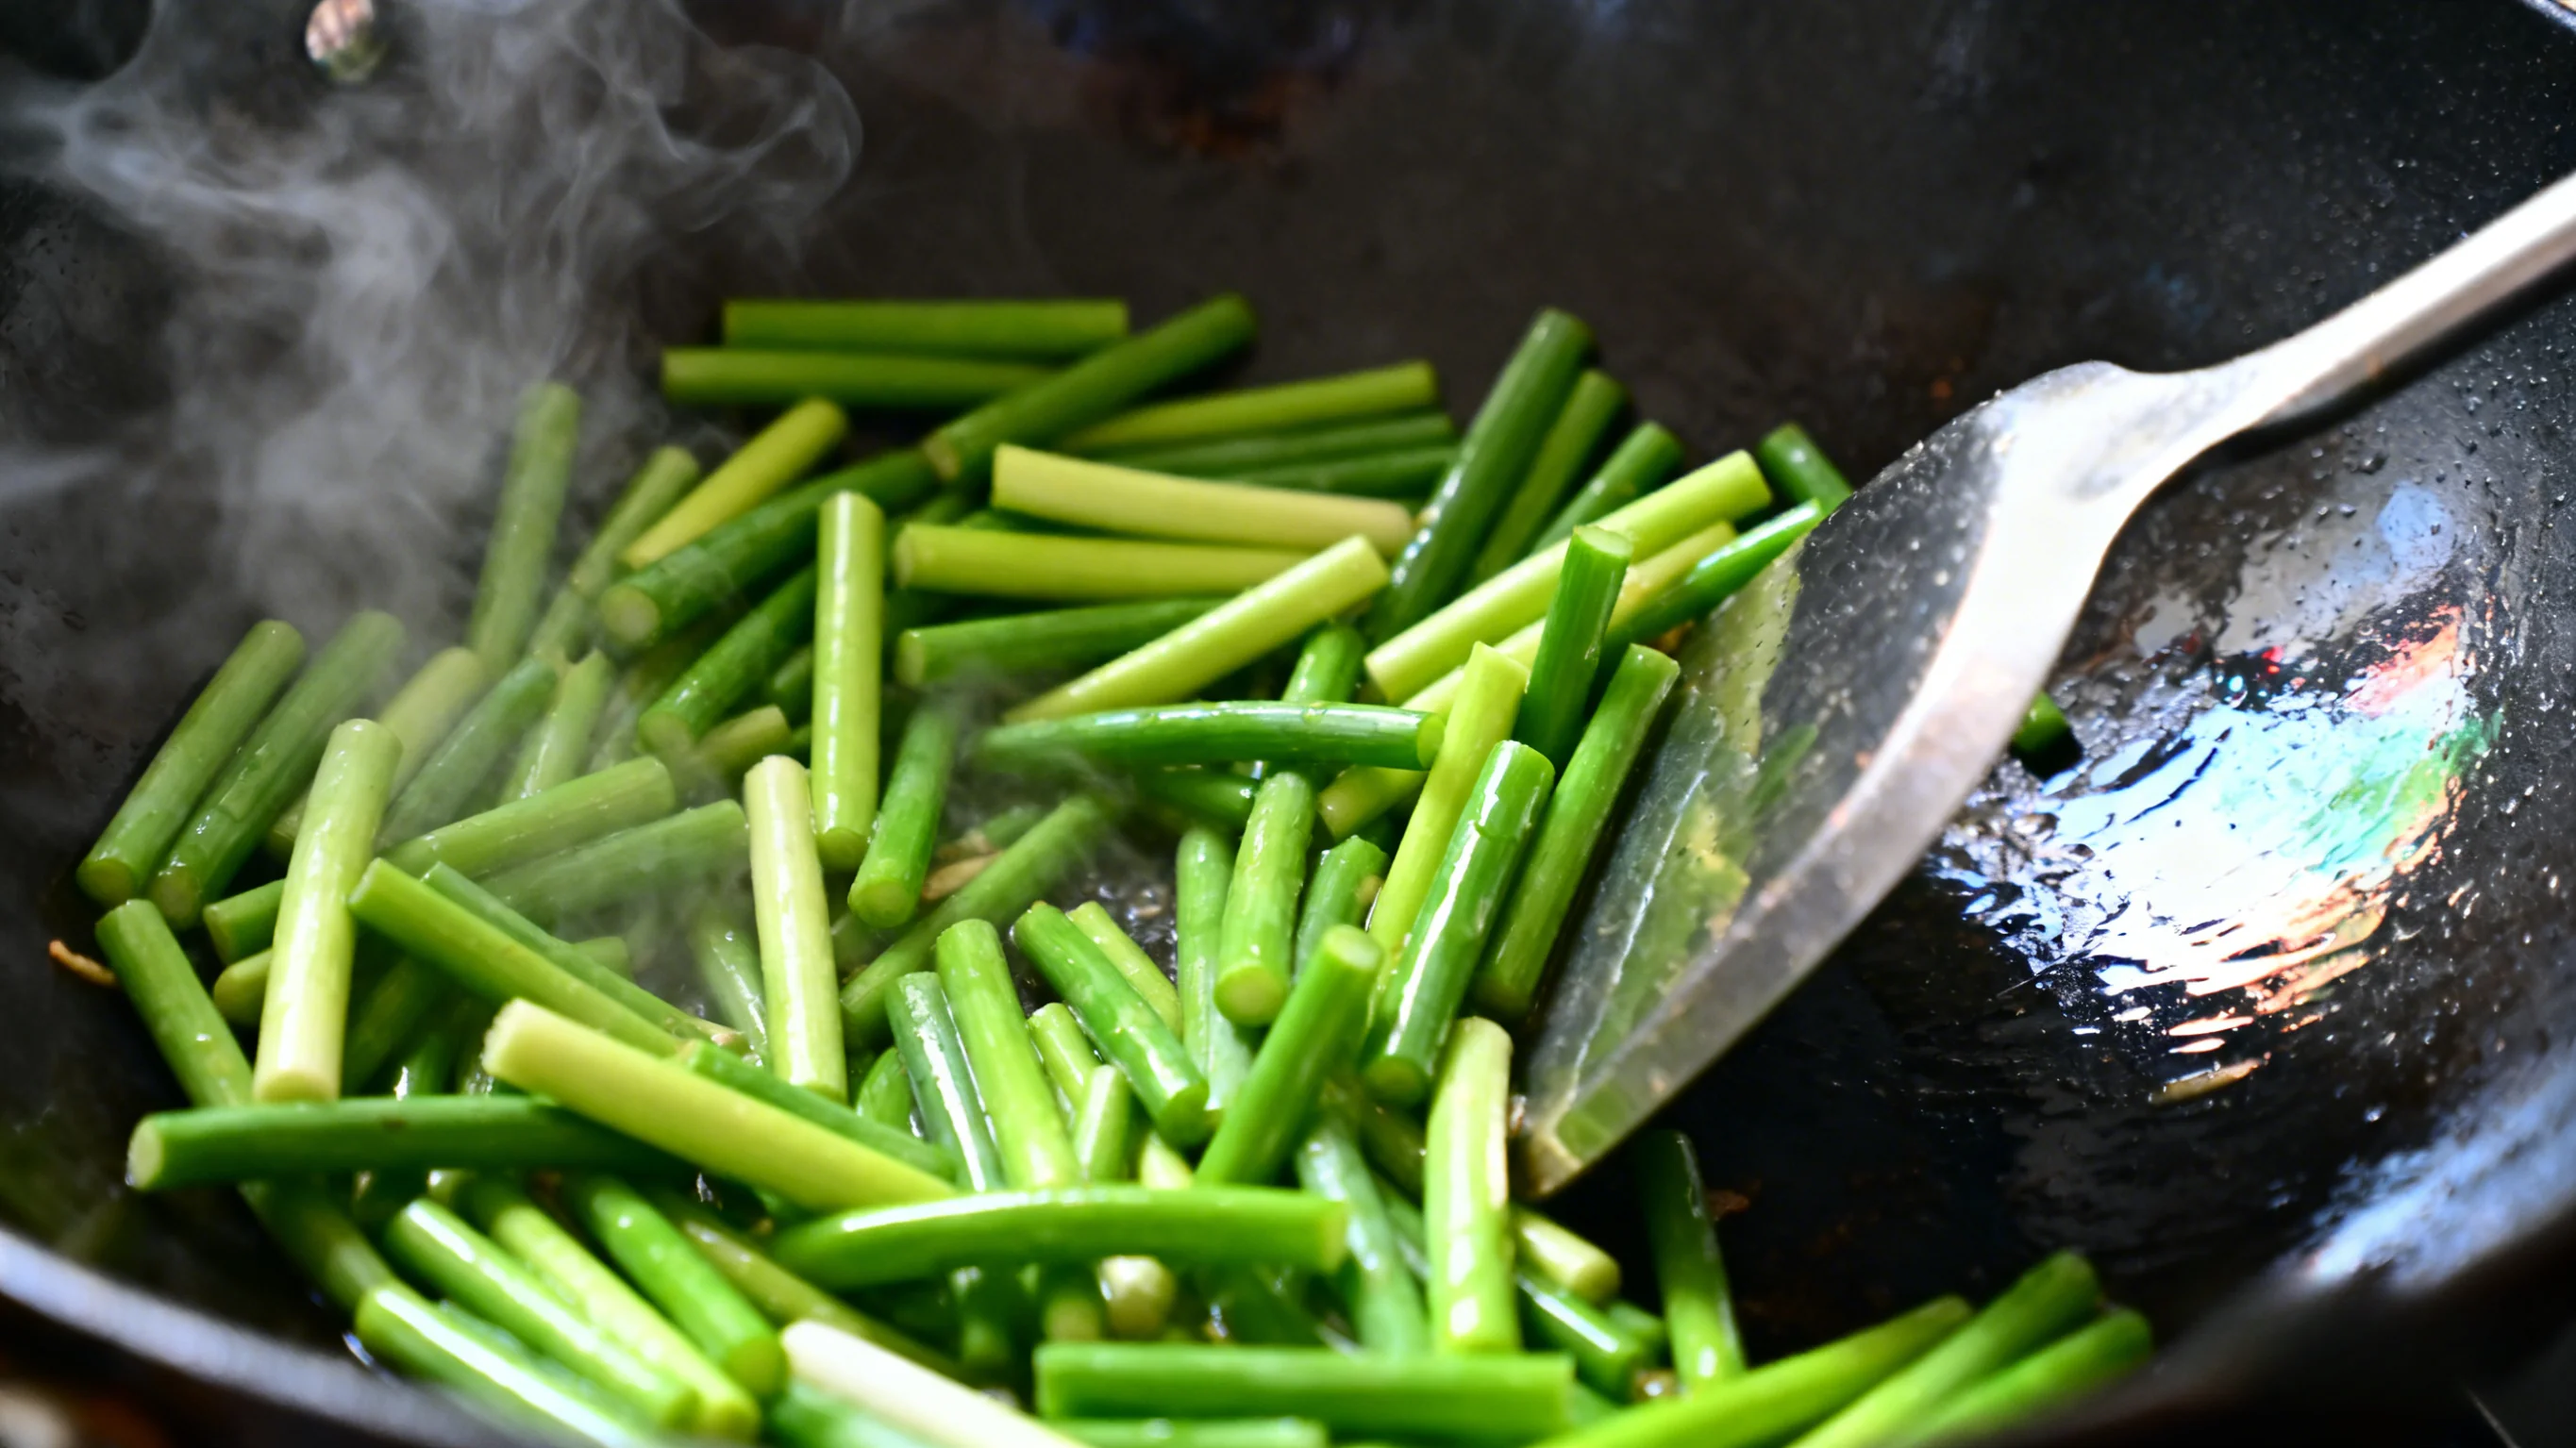 High heat maintains crispness; water creates steam for faster cooking
Step 7: Combining and Seasoning
- Add cooked pork slices
- Pour soy sauce along pan edge
- Add salt and sugar to season
- Stir-fry quickly to combine
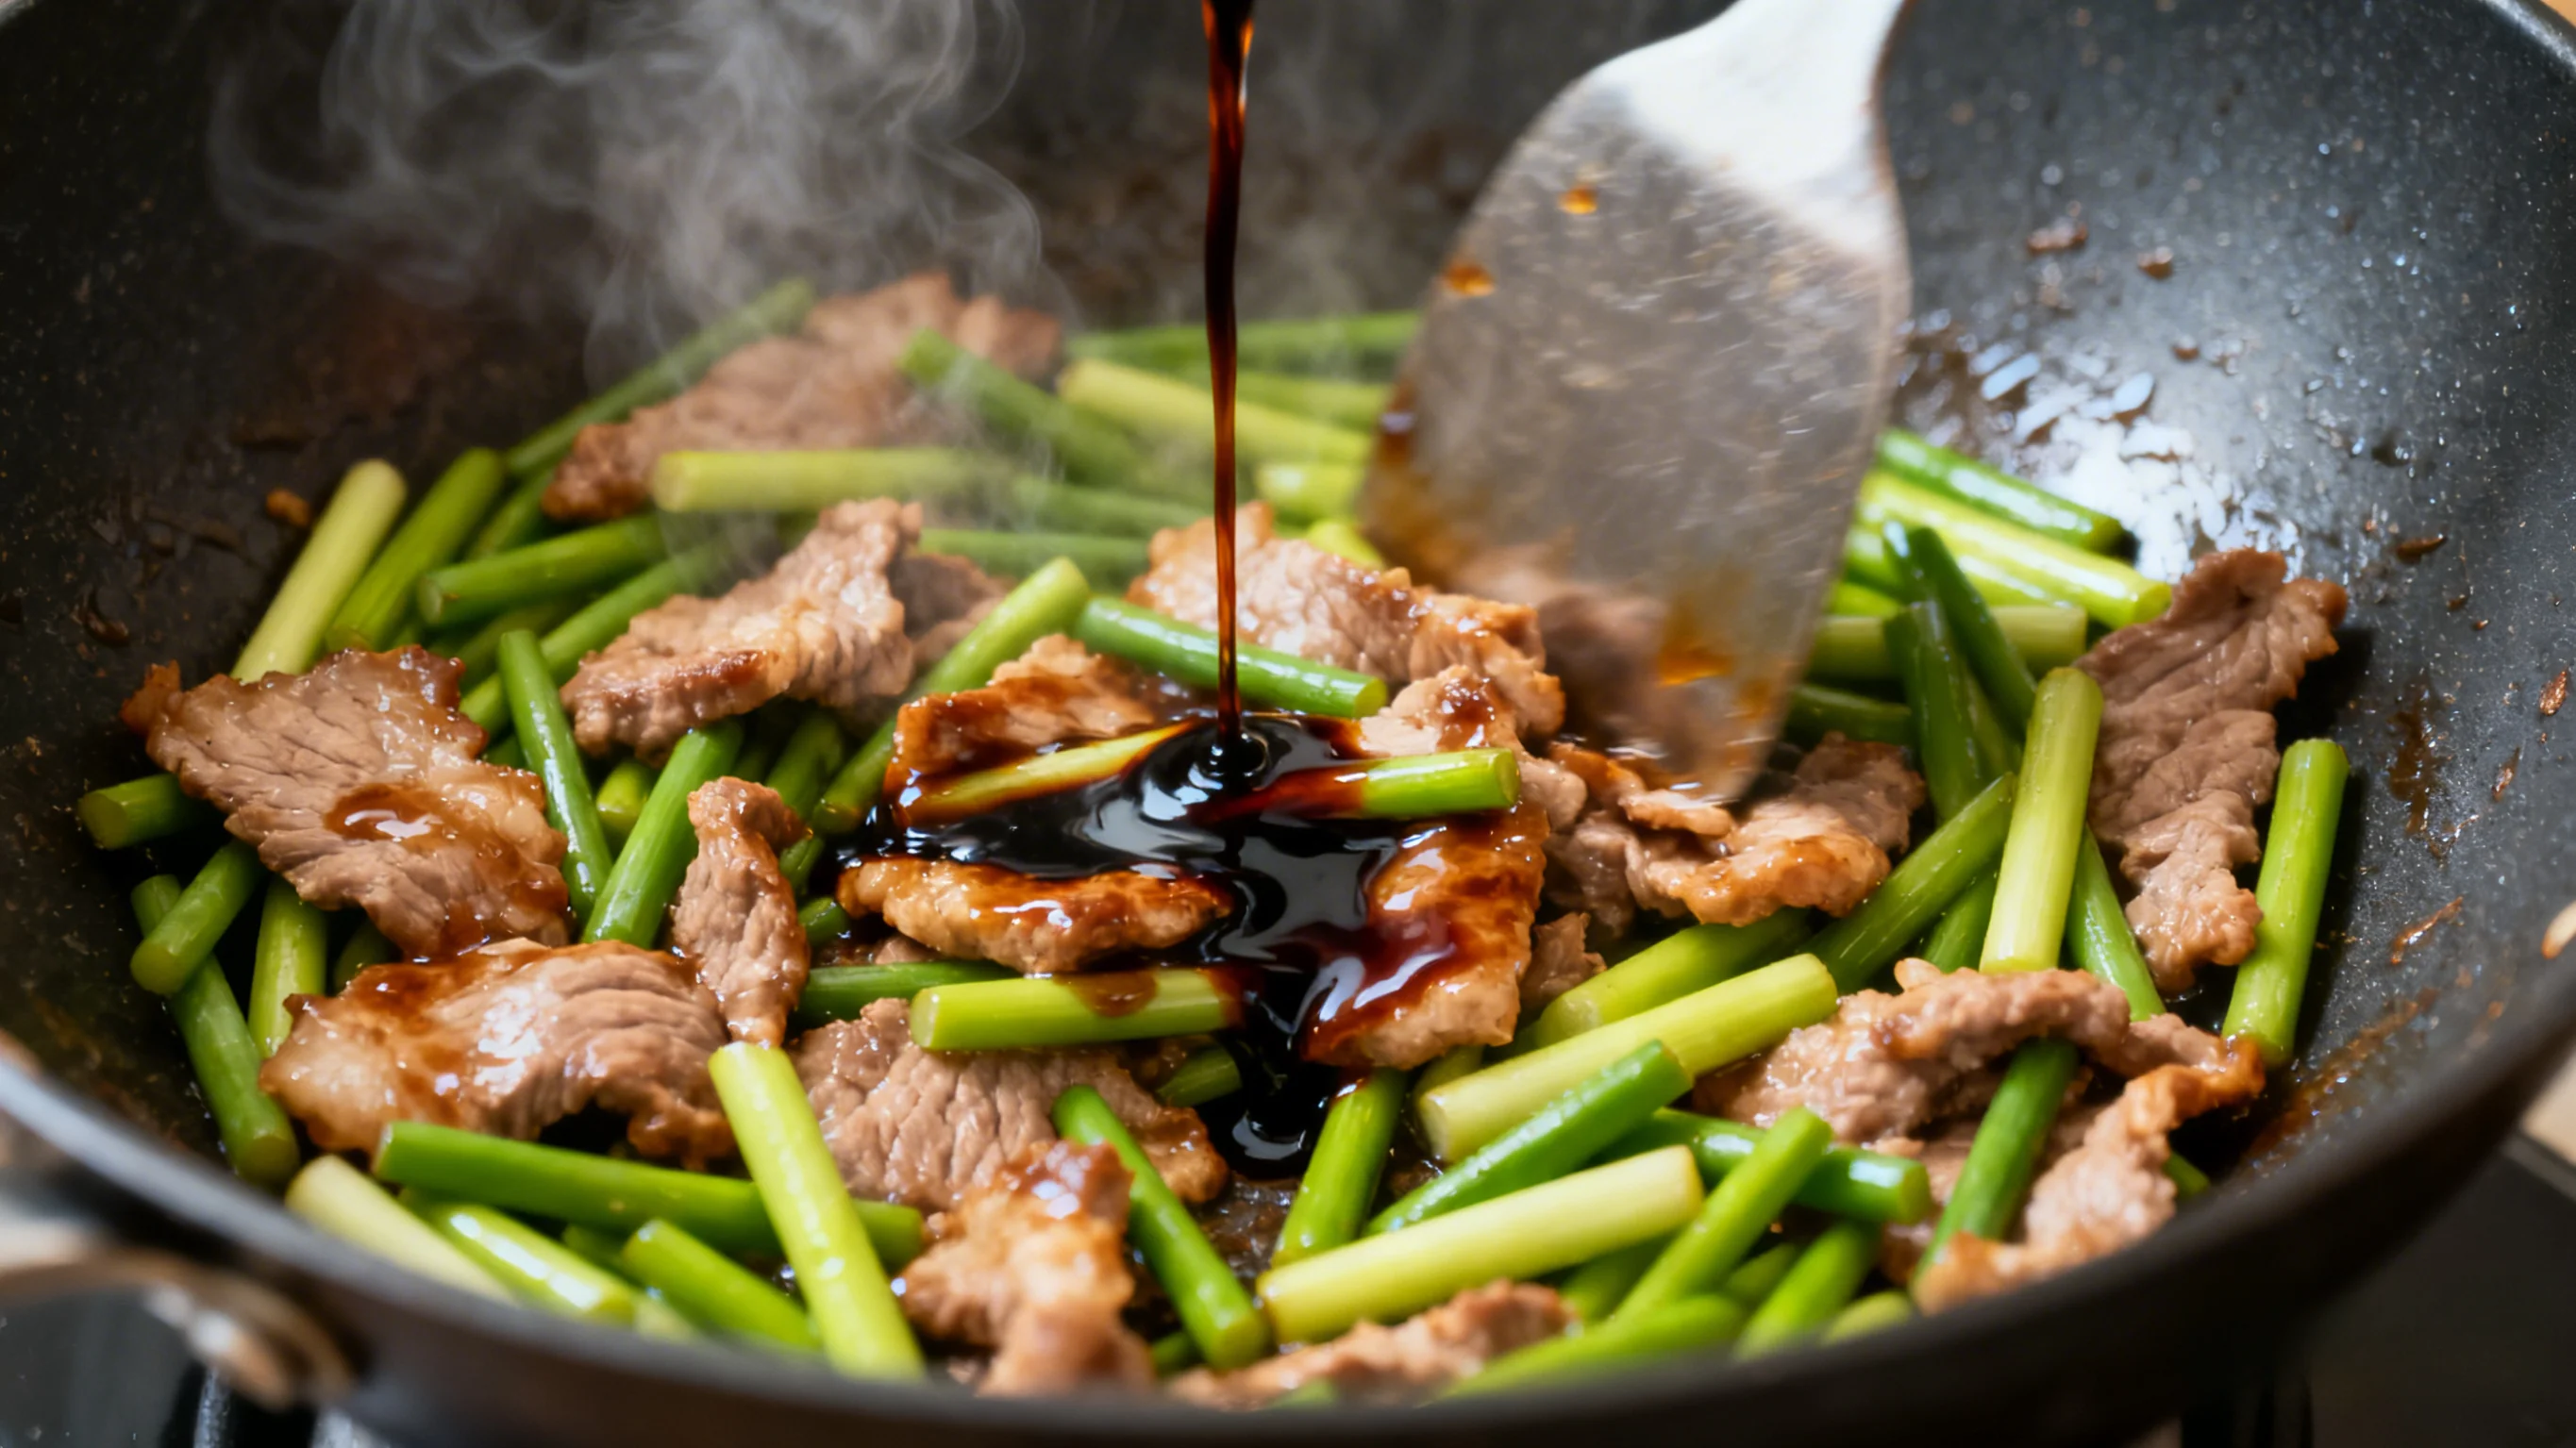 Pan-edge pouring releases sauce aroma; quick mixing integrates flavors
Step 8: Finishing Touch
- Turn off heat after mixing
- Add sesame oil for aroma
- Pro technique: Add sesame oil after turning off heat
- Mix using residual heat
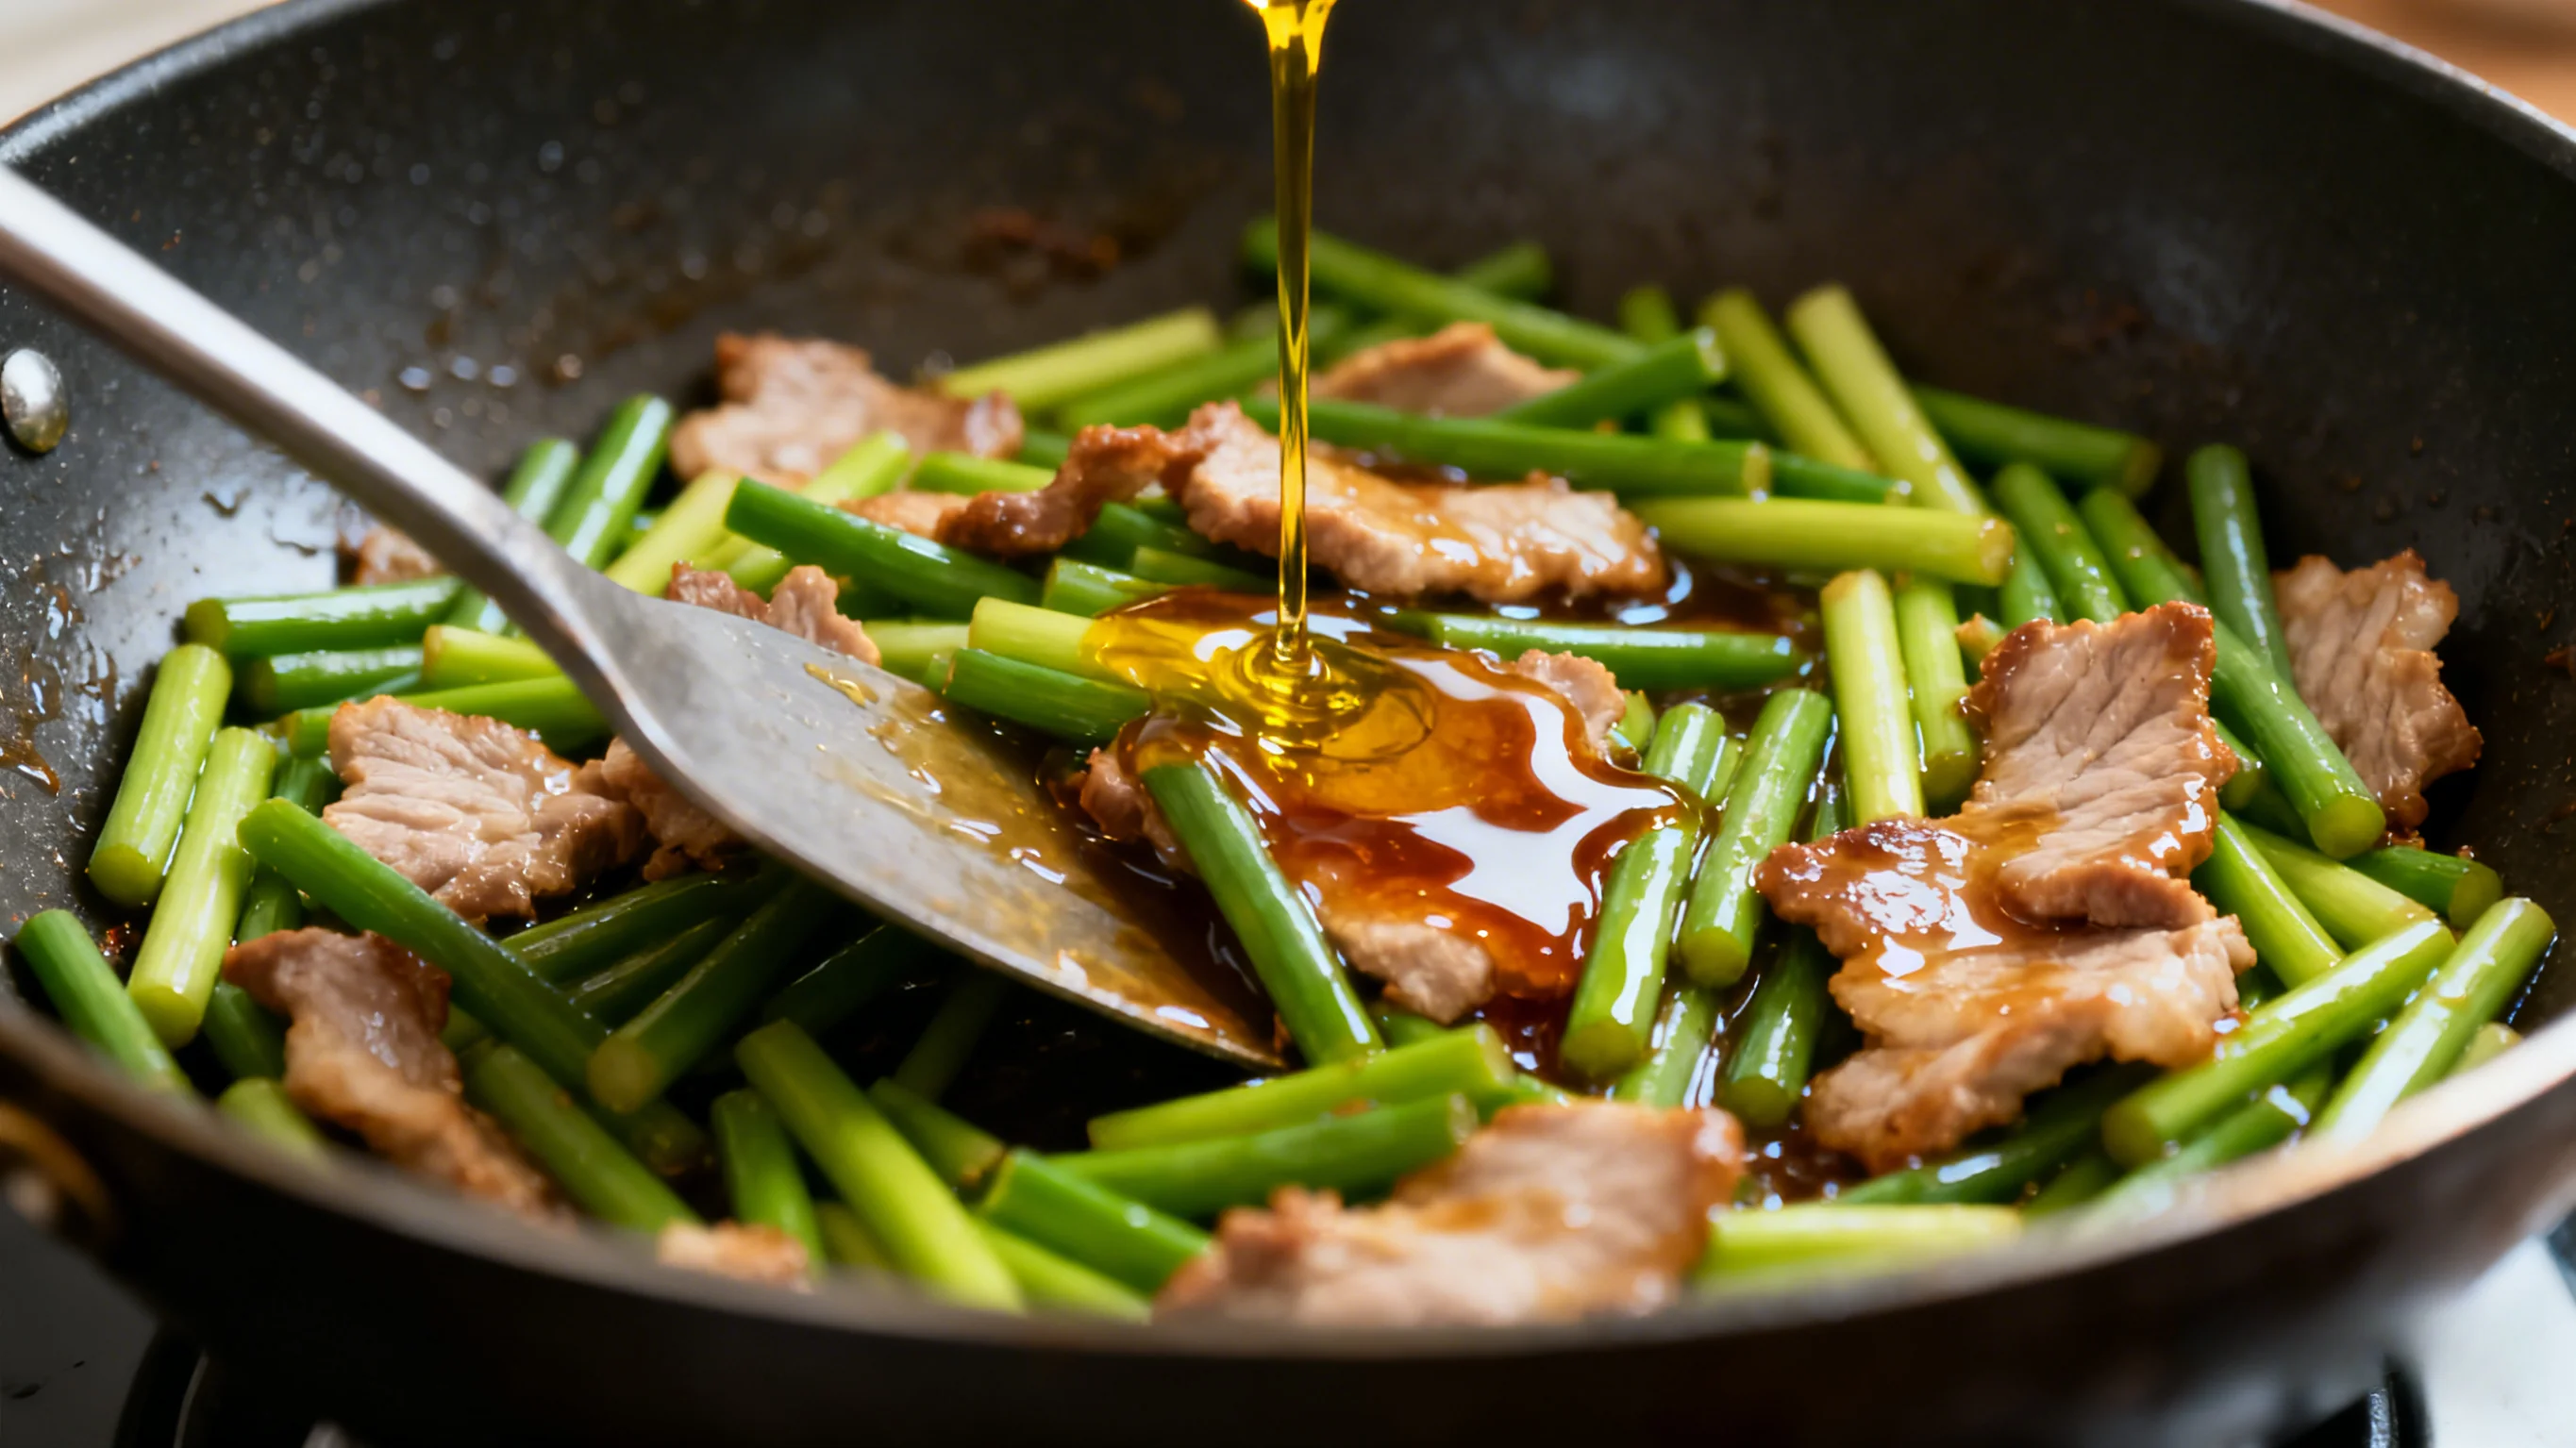 Sesame oil heat-sensitive; adding after heat-off preserves aroma
Step 9: Plating and Serving
- Transfer to deep plate or shallow bowl
- Garnish with scallions
- Serve hot: Temperature crucial for texture
- Best with rice
Deep plate easier to serve; scallions enhance color and aroma
Exclusive Three Secrets
🎯 Secret #1: Pork “Against-Grain Thin-Slice Oil-Seal”
- Against grain slicing: Breaks muscle fibers, more tender
- Even thickness: About 2mm—too thick cooks unevenly, too thin breaks
- Oil-seal marination: Final oil creates protective layer
- Kneading technique: Knead until sticky for more tender texture
🎯 Secret #2: Garlic Sprouts “Quick-Blanch Ice-Bath”
- Quick 30-second blanch: Removes raw spiciness, maintains crispness
- Salt-oil water: Preserves green color
- Immediate ice bath: Cold water locks color and texture
- Thorough draining: Prevents water release during stir-frying
🎯 Secret #3: Cooking “Staged Quick-Stir-fry”
- First stir-fry pork: Moderate heat for tenderness
- Then stir-fry sprouts: High heat for crispness
- Final combination: Avoids overcooking
- Speed throughout: Minimizes cooking time
Advanced Techniques
🌟 Meat Variations:
- Beef version: Use beef tenderloin, add baking soda in marinade
- Chicken version: Use chicken breast, slice thinner
- Cured meat version: Use Chinese cured pork, unique flavor
- Shredded version: Cut into shreds, better for wraps
🌟 Flavor Variations:
- Bean paste version: Add Sichuan broad bean paste, Sichuan-style
- Oyster sauce version: Use oyster sauce instead of some soy sauce, more umami
- Fermented bean version: Add fermented black beans, richer flavor
- Sour-spicy version: Add vinegar and more chili, appetizing with rice
🌟 Ingredient Upgrades:
- Add wood ear mushrooms: Adds texture layers
- Add shiitake mushrooms: Enhances umami
- Add dried tofu: Adds protein
- Add bamboo shoots: Spring seasonal pairing
FAQ
Q: Why is my pork tough after cooking? A: Possible reasons: ① Sliced with grain ② Oil temperature too high ③ Cooked too long ④ Insufficient marination
Q: Can I skip blanching garlic sprouts? A: Yes, but requires longer stir-frying, texture softer, garlic spiciness stronger
Q: How long to stir-fry garlic sprouts? A: 1-2 minutes after blanching, maintains crisp texture
Q: Can I add other vegetables? A: Yes, but choose low-moisture vegetables like carrot strips, bell peppers
Nutritional Value
- ✅ Quality protein: Pork provides complete protein
- ✅ Allicin: Garlic sprouts rich in allicin, antibacterial
- ✅ Dietary fiber: Garlic sprouts rich in fiber, aids digestion
- ✅ Low fat: Using lean meat reduces fat
- ✅ Vitamins: Rich in vitamin C and B vitamins
Serving Suggestions
- 🍚 With rice: Classic pairing, sauce perfect with rice
- 🍜 With noodles: As topping for garlic sprouts pork noodles
- 🫓 With wraps: Roll in spring pancakes or thin pancakes
- 🍺 With beer: Home-style drinking snack
- 🥣 With soup: Like seaweed egg drop soup, balances textures
- 🥗 With cold dish: Like century egg tofu, refreshing contrast
Garlic sprouts with pork isn’t just a dish—it’s seasonal enjoyment: savoring spring flavors when garlic sprouts are at their freshest. Remember: Good pork + good garlic sprouts + good heat control = Perfect garlic sprouts with pork!
Total Cooking Time: 23 minutes
Difficulty Level: ★☆☆☆☆ (Beginner friendly)
Success Rate: 90% following tips
Best Served: Immediately after cooking, best hot
Pro Tip: When trimming garlic sprouts, try bending by hand—where it snaps easily is the tender part; tough ends need removal!